How to Check for IP Leaks When Using a VPN (WebRTC & DNS)

You’ve done the responsible thing. You subscribed to a reputable Virtual Private Network (VPN), installed the app, and clicked the big “Connect” button. You see the green light, and you feel safe, believing your digital footprint is now invisible to your Internet Service Provider (ISP), hackers, and data brokers.
But are you truly hidden?
There is a common misconception that simply turning on a VPN guarantees total anonymity. Unfortunately, subtle technical vulnerabilities—specifically DNS leaks and WebRTC leaks—can expose your real identity even when your VPN says it is connected. According to a report by The Best VPN, a significant percentage of free and low-quality VPNs fail to protect users from these specific types of leaks.
If your VPN is leaking, you are essentially driving a car with tinted windows but yelling your name out of a megaphone. This guide will walk you through exactly what these leaks are, how to check for them, and, most importantly, how to fix them.
The Anatomy of an IP Leak
Before we dive into the testing process, it is crucial to understand what we are looking for. An IP leak occurs when your computer inadvertently bypasses the encrypted VPN tunnel and sends data directly through your default network. When this happens, your real IP address (your digital home address) becomes visible to the websites you visit.


There are three main culprits when it comes to these leaks:
DNS Leaks: This happens when your DNS requests (the lookups that translate “https://www.google.com/search?q=google.com” into a computer-readable IP address) escape the VPN tunnel.
WebRTC Leaks: A vulnerability within web browsers that allows voice and video chats but can also reveal your true IP.
IPv6 Leaks: Many VPNs only protect IPv4 traffic, leaving the newer IPv6 protocol exposed.
What is a DNS Leak?
The Domain Name System (DNS) is often called the phonebook of the internet. When you type a URL into your browser, your computer contacts a DNS server to find the IP address associated with that name.
Typically, your ISP assigns these DNS servers. When you use a VPN, the VPN should force your computer to use their secure DNS servers. However, if your operating system gets confused or the VPN isn’t configured correctly, your computer might revert to using your ISP’s DNS servers.
Why is this bad? Even if your traffic is encrypted, if your DNS requests are leaking, your ISP can still see exactly which websites you are visiting. As noted by privacy advocates at Electronic Frontier Foundation (EFF), metadata (like DNS requests) can be just as revealing as the content of the communication itself.
What is a WebRTC Leak?
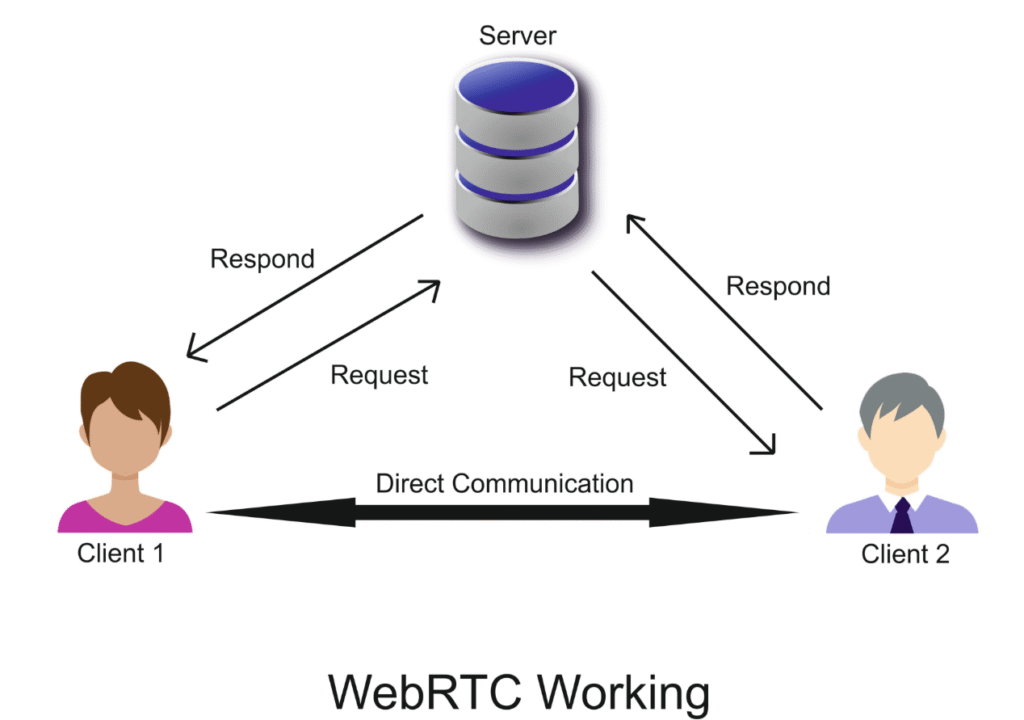
Web Real-Time Communication (WebRTC) is a feature built into most modern browsers like Chrome, Firefox, and Edge. It allows for direct communication between browsers without needing intermediate servers—think of Google Meet, Discord on the web, or Zoom browser clients.
While convenient, WebRTC has a darker side for privacy enthusiasts. To establish a direct line of communication, WebRTC needs to know your actual IP address. Cleverly designed websites can use a few lines of code to ask your browser for this information. Shockingly, your browser will often hand over your real IP address even if you are connected to a VPN.
Step-by-Step: How to Test for Leaks
Testing for these leaks is straightforward and doesn’t require advanced technical skills. Follow this protocol to audit your connection.
Phase 1: Establish a Baseline
Disconnect from your VPN.
Go to Google and search “What is my IP.”
Write down the IP address you see. This is your real IP (provided by your ISP).
Phase 2: Connect and Verify
Turn on your VPN and connect to a server in a different country (e.g., if you are in Indonesia, connect to Singapore or the USA).
Visit a dedicated leak testing site. (Note: We won’t use hotlinks, but reputable sites include DNSLeakTest.com, BrowserLeaks, or IPLeak.net).
Phase 3: Analyzing the Results
Once you run the test on the website, look for the following data:
The IP Address: Does the IP address displayed on the screen match the one you wrote down in Phase 1?
If YES: You have a major IP leak. Your VPN is not working.
If NO: Great, your basic IP is hidden.
The WebRTC Detection: Look for a section labeled “WebRTC.”
If it shows a “Local IP” or “Public IP” that matches your real identity (Phase 1), you have a WebRTC leak.
The DNS Test: Most sites require you to click a button like “Standard Test” or “Extended Test.”
Look at the results. You will likely see a list of servers and locations.
The Golden Rule: If the locations or owners of the DNS servers listed belong to your ISP (e.g., Comcast, Telkom, AT&T), you have a DNS leak. You want to see IP addresses owned by your VPN provider or neutral 3rd parties (like Google or Cloudflare), ideally in the country where your VPN server is located.
How to Fix WebRTC Leaks
If you discovered a WebRTC leak, do not panic. The fix usually involves tweaking your browser settings.
For Mozilla Firefox
Firefox is the most privacy-friendly browser because it allows you to disable WebRTC completely at the system level.
Type
about:configin the address bar and press Enter.Accept the warning risk (“I accept the risk!”).
Search for
media.peerconnection.enabled.Double-click the value to set it to False.
For Google Chrome & Chromium Browsers
Chrome does not offer a simple “off” switch in the settings. The most reliable method is to use an extension.
Visit the Chrome Web Store.
Search for extensions like “WebRTC Network Limiter” (an official Google extension) or “uBlock Origin.”
If using uBlock Origin, go to settings and check the box that says “Prevent WebRTC from leaking local IP addresses.”
For Safari
Safari is generally stricter, but you can verify its status.
Go to Settings/Preferences > Advanced.
Check “Show Develop menu in menu bar.”
Click Develop in the menu bar > WebRTC > Uncheck “Enable Legacy WebRTC API”.
How to Fix DNS Leaks
DNS leaks are usually an issue with the VPN client configuration or the operating system (Windows is notoriously aggressive about using its own DNS preferences).
1. Enable “DNS Leak Protection” in your VPN App
Most premium VPNs (like NordVPN, ExpressVPN, or Surfshark) have a toggle in their settings menu labeled “DNS Leak Protection” or “CyberSec.” Ensure this is turned ON.
2. Change DNS Servers Manually
If your VPN continues to leak, you can manually set your network adapter to use secure DNS servers rather than your ISP’s.
Open your Network Settings.
Locate your active connection (Wi-Fi or Ethernet).
Go to Properties > IPv4.
Change DNS from “Automatic” to “Use the following DNS server addresses.”
Input secure DNS addresses (e.g., Cloudflare uses
1.1.1.1and1.0.0.1).
3. Disable IPv6
Many VPNs struggle to tunnel IPv6 traffic. If your computer tries to use IPv6, it might bypass the VPN entirely.
Windows: Go to Network and Sharing Center > Change adapter settings > Right-click connection > Properties > Uncheck “Internet Protocol Version 6 (TCP/IPv6).”
Mac: System Preferences > Network > Advanced > TCP/IP > Configure IPv6 to “Link-local only.”
Summary: Secure vs. Leaky VPNs
To help you visualize what to look for in a provider, here is a comparison of attributes found in secure services versus those that often leak data.
| Feature | Secure VPN Provider | Leaky/Low-Quality VPN |
| DNS Handling | Owns their own DNS servers | Rents cheap servers or uses Google DNS |
| Kill Switch | Cuts internet instantly if VPN drops | Connection stays active without VPN |
| IPv6 Support | Supports or blocks IPv6 to prevent leaks | Ignores IPv6, leading to leaks |
| WebRTC Policy | Offers browser extensions to block it | Does not address WebRTC vulnerabilities |
| Logging Policy | Strict No-Logs (often audited) | Logs connection timestamps and IPs |
Frequently Asked Questions (FAQ)
Q: Does Incognito Mode prevent IP leaks?
No. Incognito or Private mode stops your browser from saving history locally on your computer. It does not hide your IP address from the internet, nor does it stop WebRTC leaks. You still need a VPN for that.
Q: I am using a “Free” VPN, but I still see my ISP’s DNS. Why?
Free VPNs often lack the sophisticated infrastructure to handle private DNS requests. Furthermore, as reported by PCMag, some free VPNs actually sell your browsing data to third parties, which defeats the purpose of privacy.
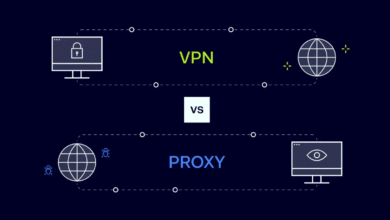
Q: Can a proxy server fix these leaks?
A proxy changes your IP address but usually does not encrypt your traffic. While it might mask your IP for basic browsing, it is far less reliable than a VPN for stopping DNS and WebRTC leaks because it operates only at the application level, not the system level.
Q: If I fix the leak once, am I safe forever?
Not necessarily. Browser updates or VPN app updates can sometimes reset settings. It is good practice to run a leak test once a month or whenever you install a major software update.
Conclusion
Achieving digital privacy is not a “set it and forget it” task; it is an ongoing process of verification. While a VPN is the most powerful tool in your arsenal, it is only effective if it is watertight. By understanding the mechanics of WebRTC and DNS leaks, you are no longer just a passive user—you are an informed digital citizen.
Don’t assume your connection is secure just because an app says so. Take five minutes today to run the tests mentioned above. If you find a leak, apply the fixes. Your personal data, your browsing history, and your peace of mind are worth the effort.