5 Easy Ways to Scan Documents with a Cell Phone — Fast and Practical

Sometimes you are forced to send important documents urgently but don’t have a scanner nearby. At such times, your smartphone can be a very effective answer. Armed with today’s advanced technology, you can scan various documents simply via your cell phone without having to bother looking for a photocopy location or other extra equipment. This practicality will certainly be very useful, especially when you are facing a time limit.
Many people don’t realize that there are various techniques you can use to carry out scans using just a smartphone. Whether it’s built-in functionality or outsourced software, each option has its own unique advantages depending on what you need. The choice of method must be adjusted to your comfort and the type of document you want to scan.
This smoothness is not only related to scanning, but also about the final quality. Using the right techniques, you can create digital documents that are sharp, neat, and ready to send in minutes.
If you’ve never tried it, it may seem complicated at first. But after knowing the options, you will understand that scanning documents with a smartphone is quite easy to do. The following five methods can be an alternative for those of you who desire speed, comfort and professional work results in terms of document processing.
Steps to Scan Documents with a Cell Phone Via Google Drive
You don’t need to bother downloading extra applications if you already have Google Drive on your Android smartphone. Usually, the application is installed by default along with the device itself.
Here are the steps for using it:
- Open the Google Drive application.
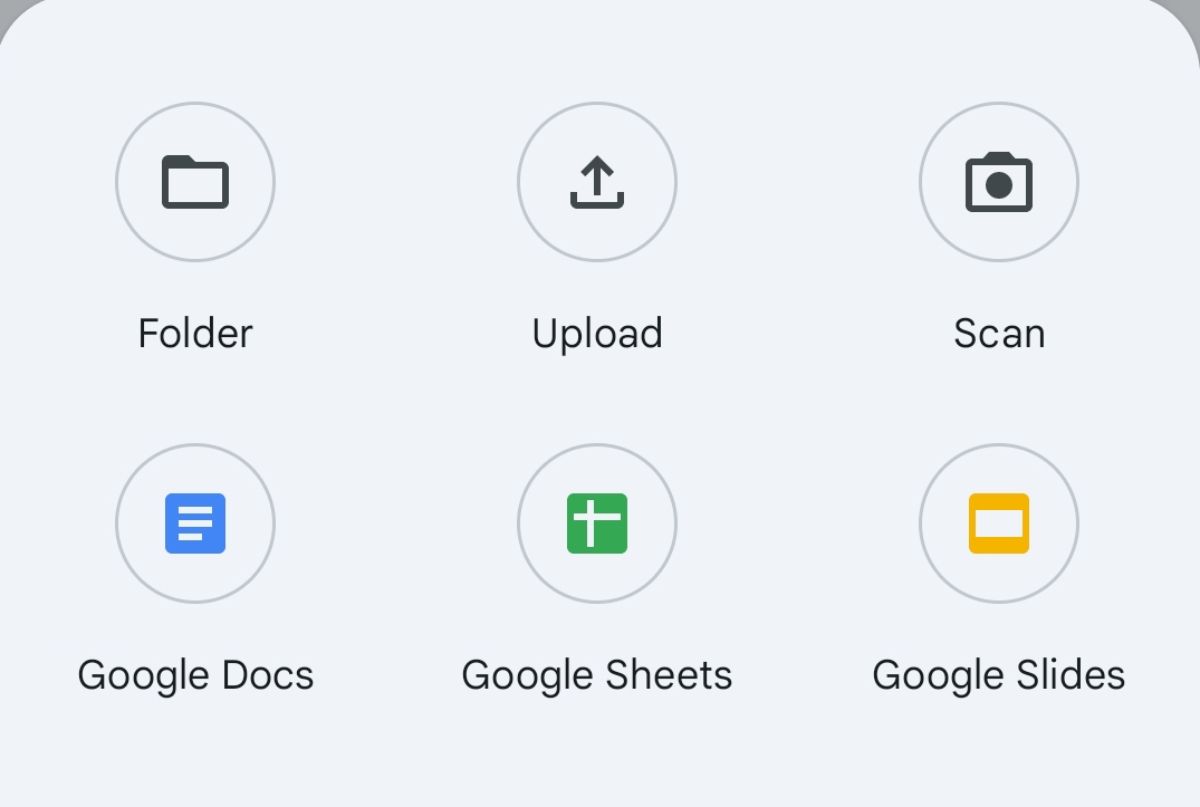
- Genting press the additional icon (+), then select the “Scan” or “Scan” menu.
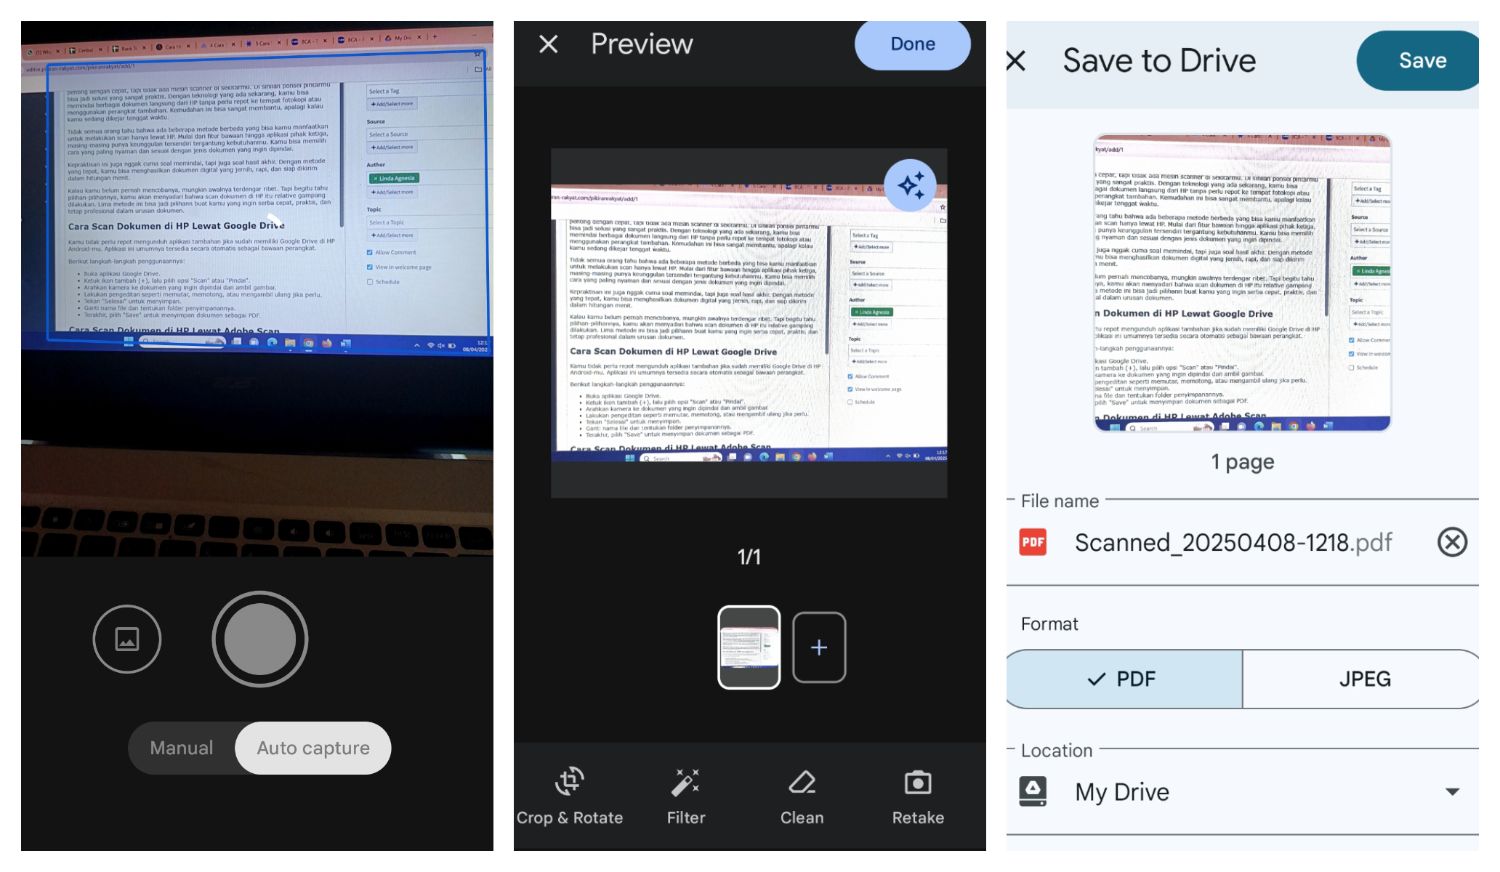
- Point the camera at the document you want to scan and take a picture.
- Make revisions by playing it, cutting it, or recording it again if necessary.
- Press “Done” to save.
- Change the file name and set the folder location.
- Finally, click “Save” to save the document in PDF format.
Steps to Scan Documents with a Cell Phone Using the Adobe Scan Application
Adobe Scan is an application made by Adobe that was created specifically to convert physical documents into PDF files that can be edited and saved digitally.


Steps to use:
- Install the Adobe Scan application via Google Play Store or Apple App Store.
- Open the application then tap the “+” icon.
- Select the “Scan Document” option.
- Place the camera on top of the document you want to scan.
- Take a picture by clicking the camera icon.
- The system will automatically reset the image display.
- Click “Save” to immortalize your file as PDF format on your device.
Steps to Scan Documents with HP Using Office Lens
Office Lens is a scanner application from Microsoft that helps you package and save documents directly into OneDrive. This application can be used on Android or iOS based devices.
Here’s how to use it:
- Download and install Office Lens.
- Launch the application, then position the camera on the document.
- Check the position so that the document is positioned correctly then press the camera button to take a picture.
- Adjust the image as necessary, for example by cropping, applying rotation, or adjusting the display.
- Click the check icon, then give the file a name.
- Select a location to save and then save the document.
Steps to Scan Documents with CamScanner on Your Phone
CamScanner is an application that is widely used to scan documents using a smartphone and is available at no cost.
- Here are the steps:
- Install the CamScanner app from Google Play Store or Apple App Store.
- Run the program, then log in with your email address or just get started without creating an account first.
- Select the camera symbol then focus on the document you want to move.
- Trim the image if necessary, for example deleting unnecessary areas.
- Adjust the document title as desired.
- Complete the job, then save and export the file to PDF format.
Steps to Scan Documents with a Cell Phone Using the Notes Application
iPhone owners can use the built-in function of the Notes app to scan documents directly.
Here’s the easy way:
- Launch the Notes application, then create a new note or select one of the notes you already have.
- Press the camera icon, then select “Scan Document”.
- Point the camera at the document, the application will automatically take a photo.
- You can modify the location or take measurements again if the results are inaccurate.
- When finished, click “Done”. The document will be saved automatically into notes.
- You can also send the file in PDF format directly from the application.
These five techniques allow you to scan documents at any time and from anywhere, just using a smartphone. Choose the application that best suits your needs and your gadget’s operating system.