
how to draw a Garuda Pancasila bird method

Drawing the Garuda Pancasila is a valuable skill for anyone who wants to know more about the symbols of the Indonesian state. Mastering this technique can be very useful, both for educational needs, works of art, and official needs. In this article, we will discuss the detailed steps about how to draw a pancasila eagle by using guideline method.
Why use the guideline method?
The auxiliary line method is a basic technique in the art of drawing that is very effective to ensure the proportions and accuracy of the drawing. This method involves creating guide lines that help in composing the elements of the drawing correctly. With this technique, even beginners can draw with satisfactory results.
Step 1: Find an Accurate Reference
Before starting to draw, it is very important to find accurate references from the Garuda Pancasila bird. There are several sources you can use:
- EDUCATION BOOK: Textbooks of history and civic education often include pictures of Garuda Pancasila.
- Internet: The official website of the Indonesian government or encyclopedia sites such as Wikipedia provide the right images.
- official documents: Official symbols often appear in state documents, paper money, and symbols of government institutions.
Step 2: Prepare tools and materials
Here are the tools and materials needed:
- drawing paper: size A4 or bigger.
- Pencil: pencil with HB hardness for sketch and 2b for details.
- Eraser: a soft eraser to correct the starting lines.
- Ruler: to help create a guideline.
- pens or markers: to confirm the line after the sketch is complete.
Step 3: Create a help line
Draw a basic outline
- Determine the size and position: first determine the size and position of the eagle on the paper. Make a rectangle as the base frame.
- Draw a vertical and horizontal line: Draw a vertical and horizontal line that divides the rectangle into four equal parts. This line will help you place the main elements.
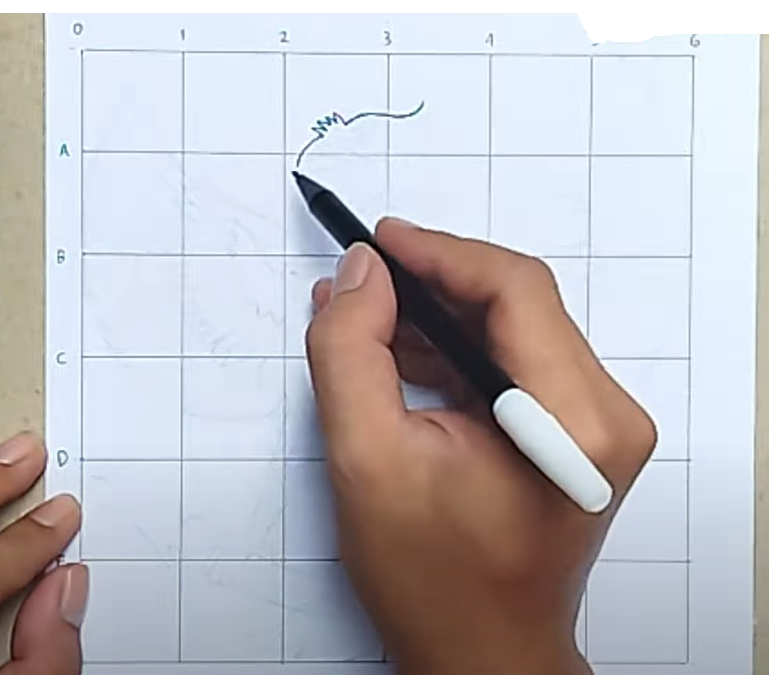

Create a guide line for the wings
- Curved lines for wings: From the point where the vertical and horizontal lines meet, draw a curved line to the right and left to form the base of the wing.
- wing details: Add smaller horizontal lines along the curved lines to help draw the wing feathers in the right proportions.
Step 4: Drawing according to the guideline
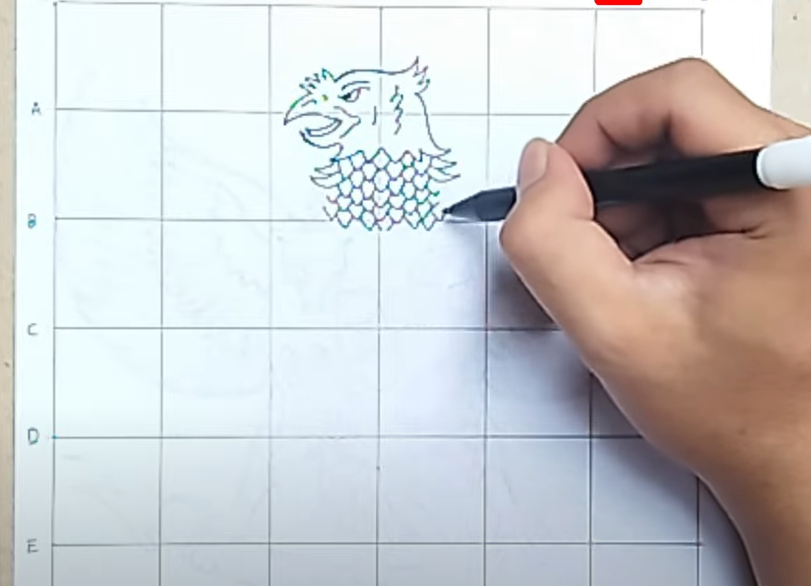
Drawing head and neck
- Head: Draw a small circle at the top of the vertical line as a guide for the head of the eagle.
- Neck: Draw two curved lines that connect the head circle to the upper body.

Drawing body and tail
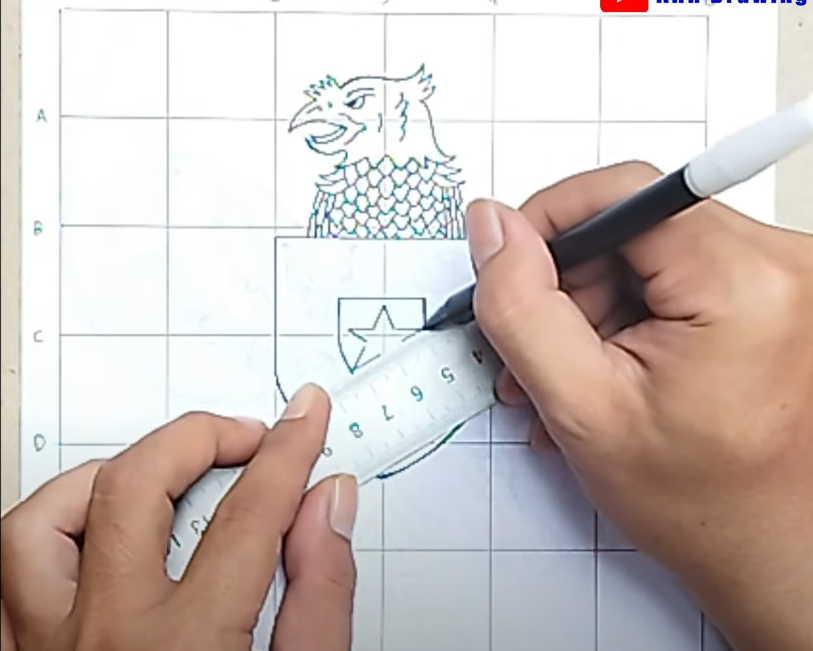
- Body: Using vertical and horizontal auxiliary lines, a larger oval drawing for the bird’s body. Make sure the proportions are appropriate.
- Tail: Draw a large triangle at the bottom of the oval for the tail. Add small lines inside the triangle for the tail feathers.

Drawing legs and claws
- Foot: Draw two straight lines from the bottom of the body as a guide for the legs.
- Claw: At the end of the foot, draw a small oval shape for the claws. Add details according to the reference.
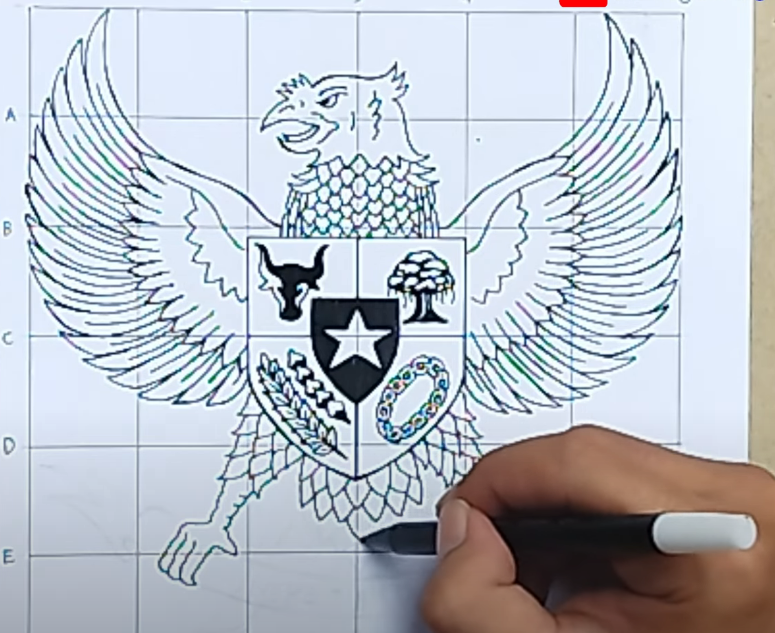

Step 5: Adding Final Details
- Head Details: Add details to the head, such as the eyes, beak, and headdress of Garuda.
- Details of wings and feathers: Follow the auxiliary lines to add feathers to the wings and tail. Make sure each feather is drawn carefully and in detail.
- claw details: Draw the claws in more detail, including the radius and grip on the shield.
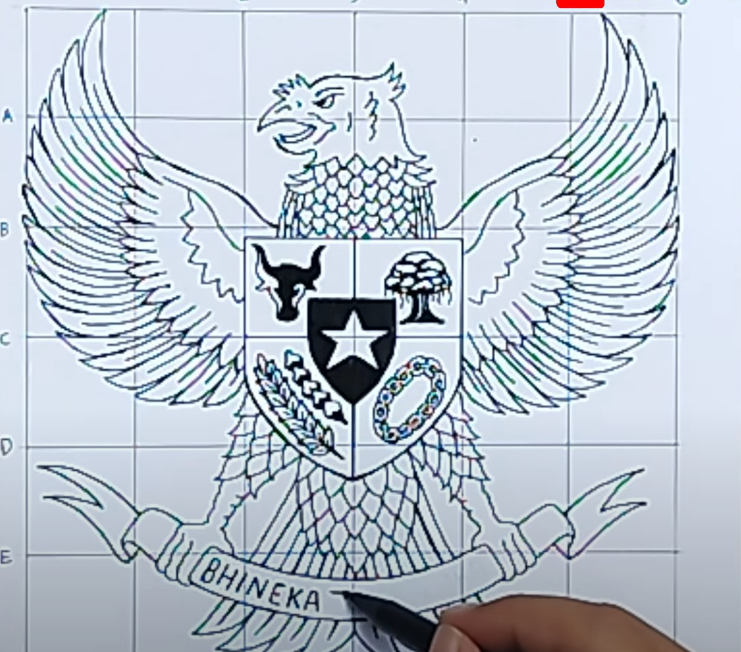

Step 6: Delete the help line
After all the details have been drawn, carefully remove the auxiliary lines. Make sure there are no visible guidelines in the final image.
Step 7: Affirming the Line
To give a more professional look, use a pen or marker to emphasize the final lines. It also helps ensure the image is more durable and clear.
Step 8: Coloring (optional)
If you want to give color to the Garuda Pancasila bird image, use colored pencils or watercolors. Make sure the coloring is done carefully and in accordance with the official color of the eagle.
FAQ: Frequently Asked Questions
Q: What is the main function of the guide line in drawing the Garuda Pancasila bird?


A: Auxiliary lines help ensure the proportions and position of the drawing elements so that the final result is more accurate and symmetrical.
Q: Where can I find an accurate reference to the Garuda Pancasila bird image?
A: You can find references in textbooks, the official website of the Indonesian government, and state documents.
Q: What are the tools needed to draw the Garuda Pancasila bird?
A: The tools needed include drawing paper, HB and 2B pencils, erasers, rulers, and pens or markers.
Q: Why is it important to remove the help lines after finishing drawing?
A: Removing the auxiliary lines helps clarify the final image and gives a more professional and clean look.
Q: Do I need to add color to the Garuda Pancasila bird image?
A: Coloring is optional. If you want the image to look more vivid and attractive, you can add colors according to the official color reference.
Q: How do I make sure my image is proportional and accurate?
A: Using auxiliary lines and accurate references is key to ensuring the drawing is proportional and accurate.
By following the steps above, you will be able to draw the Garuda Pancasila bird with satisfactory results. Remember that practice and patience are the keys to mastering this skill. Good luck!


